Tuesday, July 15, 2014

Roof and Interior Re-Work

The local sheetmetal shop has finished my galvanized roof panels, so I picked them up and got to work on the roof.  The two end pieces have three sides that are bent 90 degrees and the two ends of the center piece are also bent.  These will be screwed into the aluminum side rails of the roof.  There will be two lap seams that will also be fastened to the aluminum cross beams, so the roof will be securely held down.

Sheet metal roof panel and 90 degree bent edges.

First, I put the two end panels on.  I used butyl tape to seal the perimeter to the roof rails and prevent water ingression there.  Then I was able to install the exterior corner brackets for the roof.  These are what the bolts for the lift system are fastened to.  The original brackets were cast Aluminum and had broken or cracked due to the stresses from the lift system.  I had a local shop make corner pieces from stainless steel that will fasten through these brackets to the aluminum roof rail to better handle the stress.

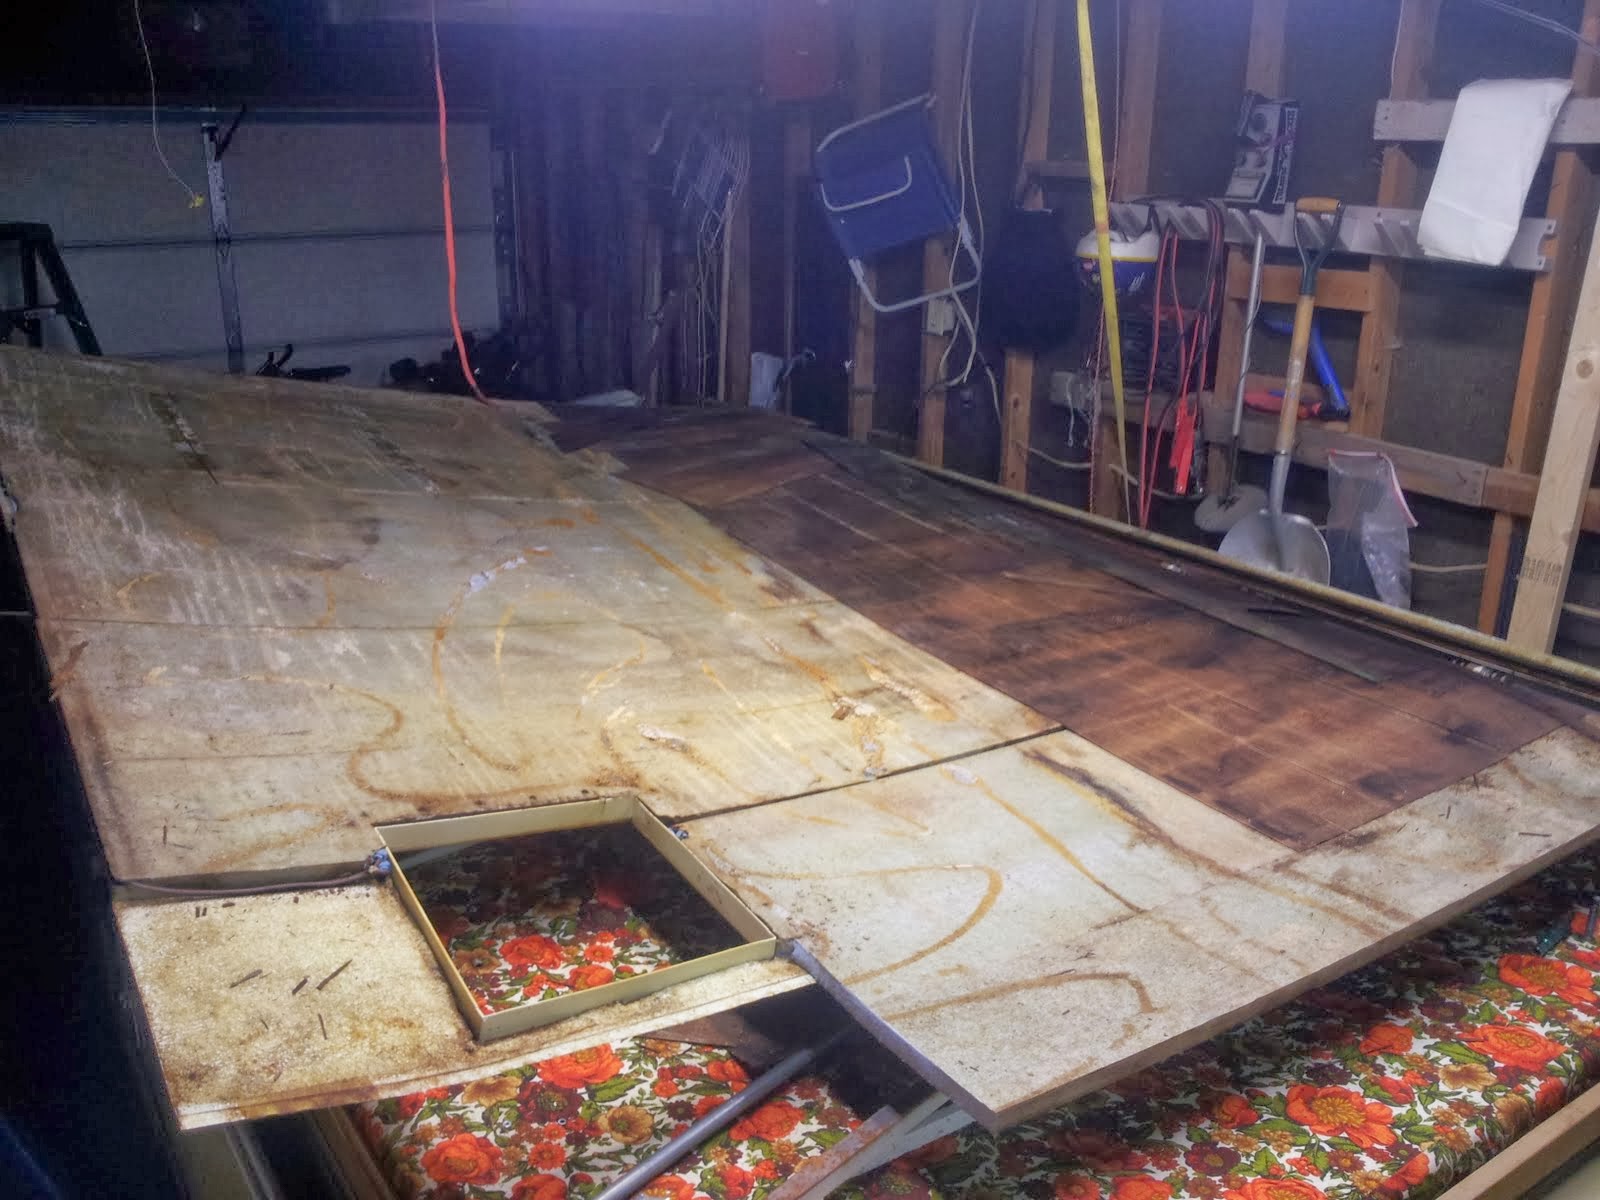
Original corner bracket.  This is the only one of four that wasn't cracked.  The two rear ones were missing most of the metal under the larger bolt hole.

The center piece of the roof lays on top of the two ends and forms two lap seams.  I used Eternabond double stick tape to seal the gap between the panels on each seam, fastened them down along the seam with stainless screws, and applied Eternabond roof seal tape over that.  Then I used Eternacaulk to seal up the edges of the tape.  Before each of these steps, I cleaned the area with acetone.  I used the same process to seal the roof vent down. The Eternabond tape is a PITA to work with in my opinion for the same reasons that works great.  It is extremely gummy and tacky.  It will stick to everything it touches on the way to installing it where you want.  It also gums up scissors while cutting.  Keeping the roll in the freezer helps all of this.  The Eternacaulk product sticks very well and seems to stay flexible, and will hopefully stand up to the wind and such while the camper is in transit and protect the tape from detaching.

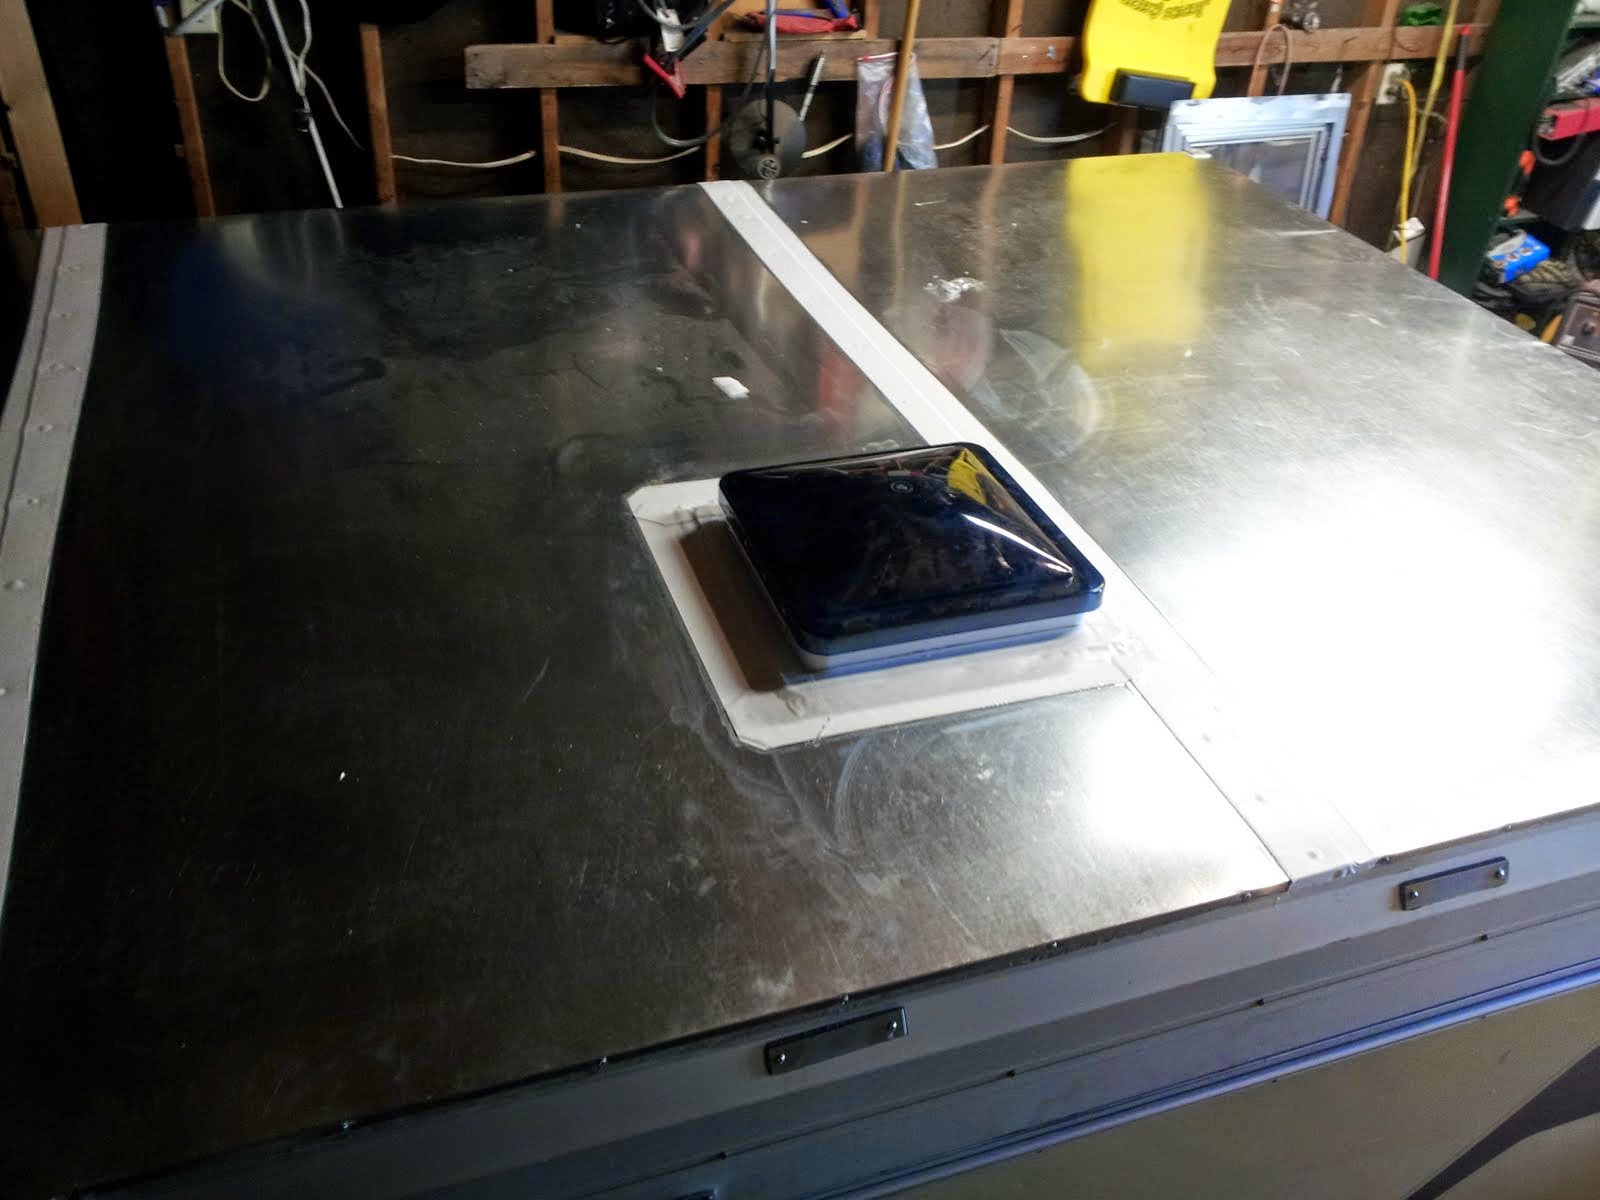
Roof vent installed on roof.

After finishing the roof up and giving the caulk a few days to cure, I was finally able to park it in the driveway and not worry about rain.  Wouldn't you know it, a few hours after I brought it out a large rainstorm came through.  I hung out in the camper during the storm and the roof held up well.  The canvas not so much.  According to the directions, it needs a couple wet/dry cycles for the stitching to settle in and seal. 

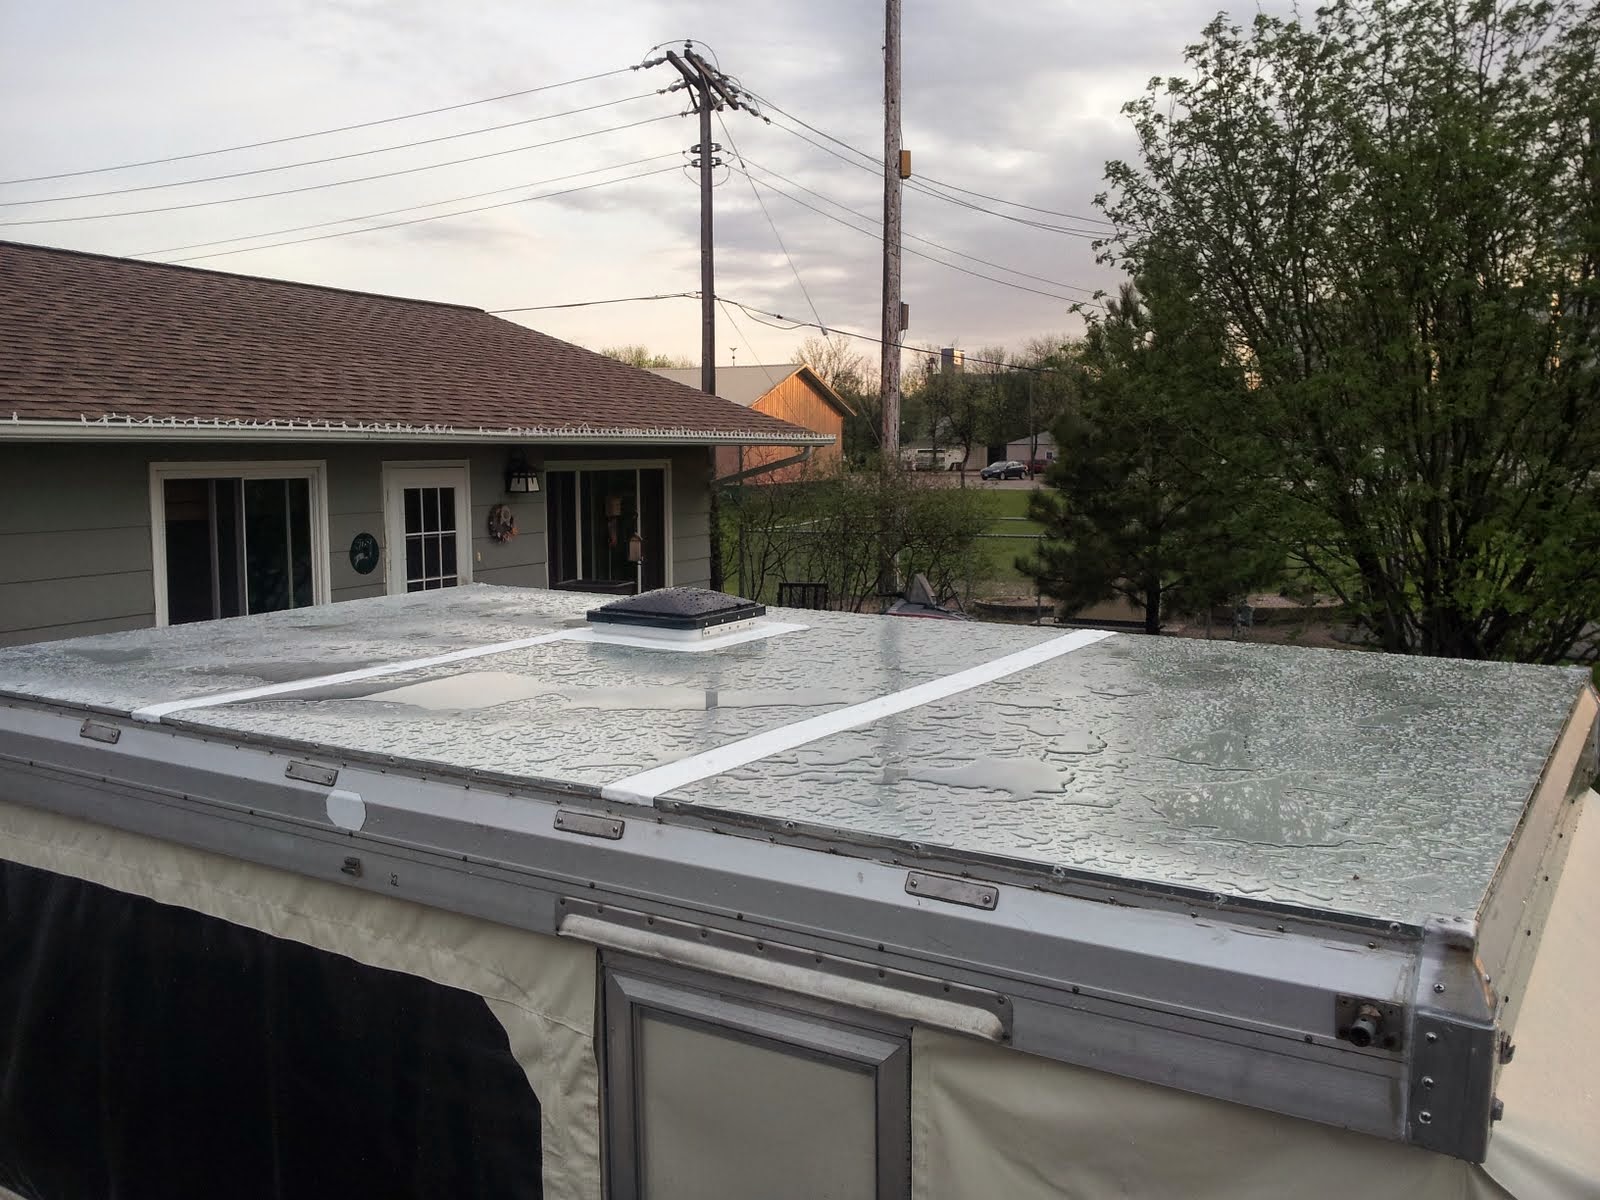
The roof after a rainstorm.  I think the water pooling will improve as the oil residue from the shop wears away. It doesn't seem to do this near the seams where I cleaned the oil off.

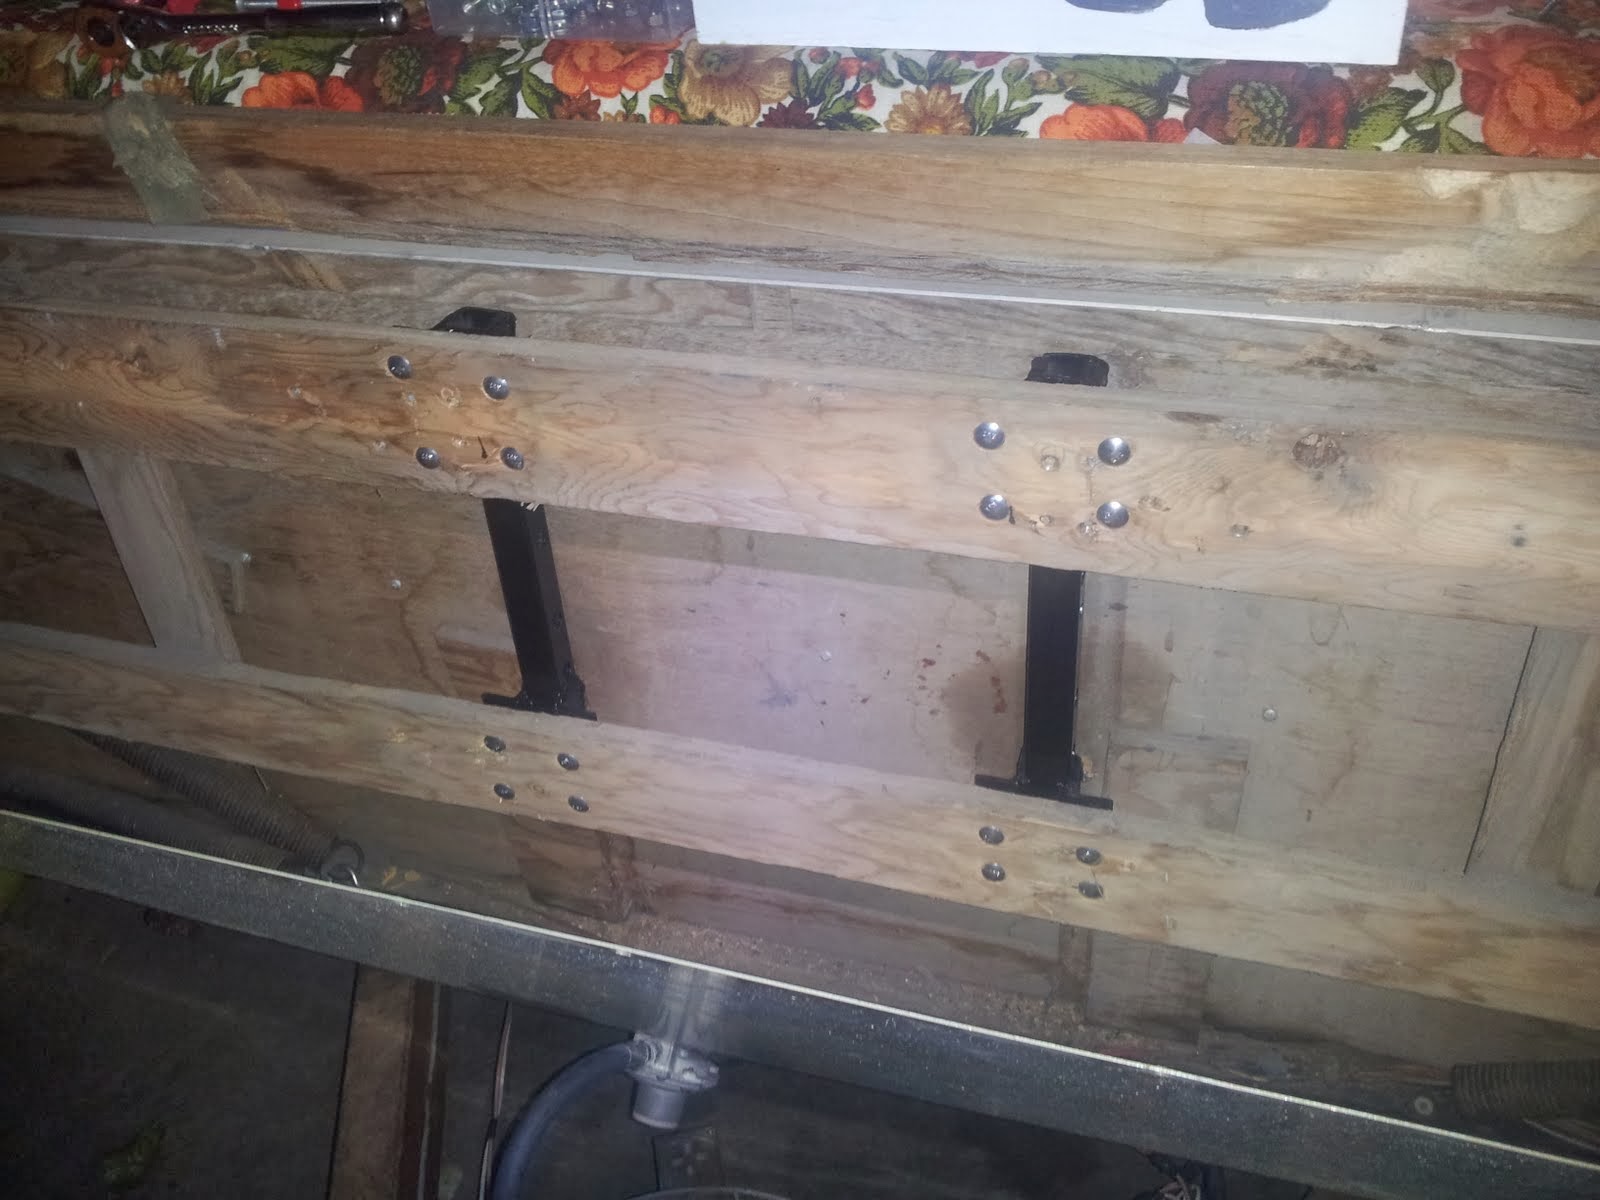
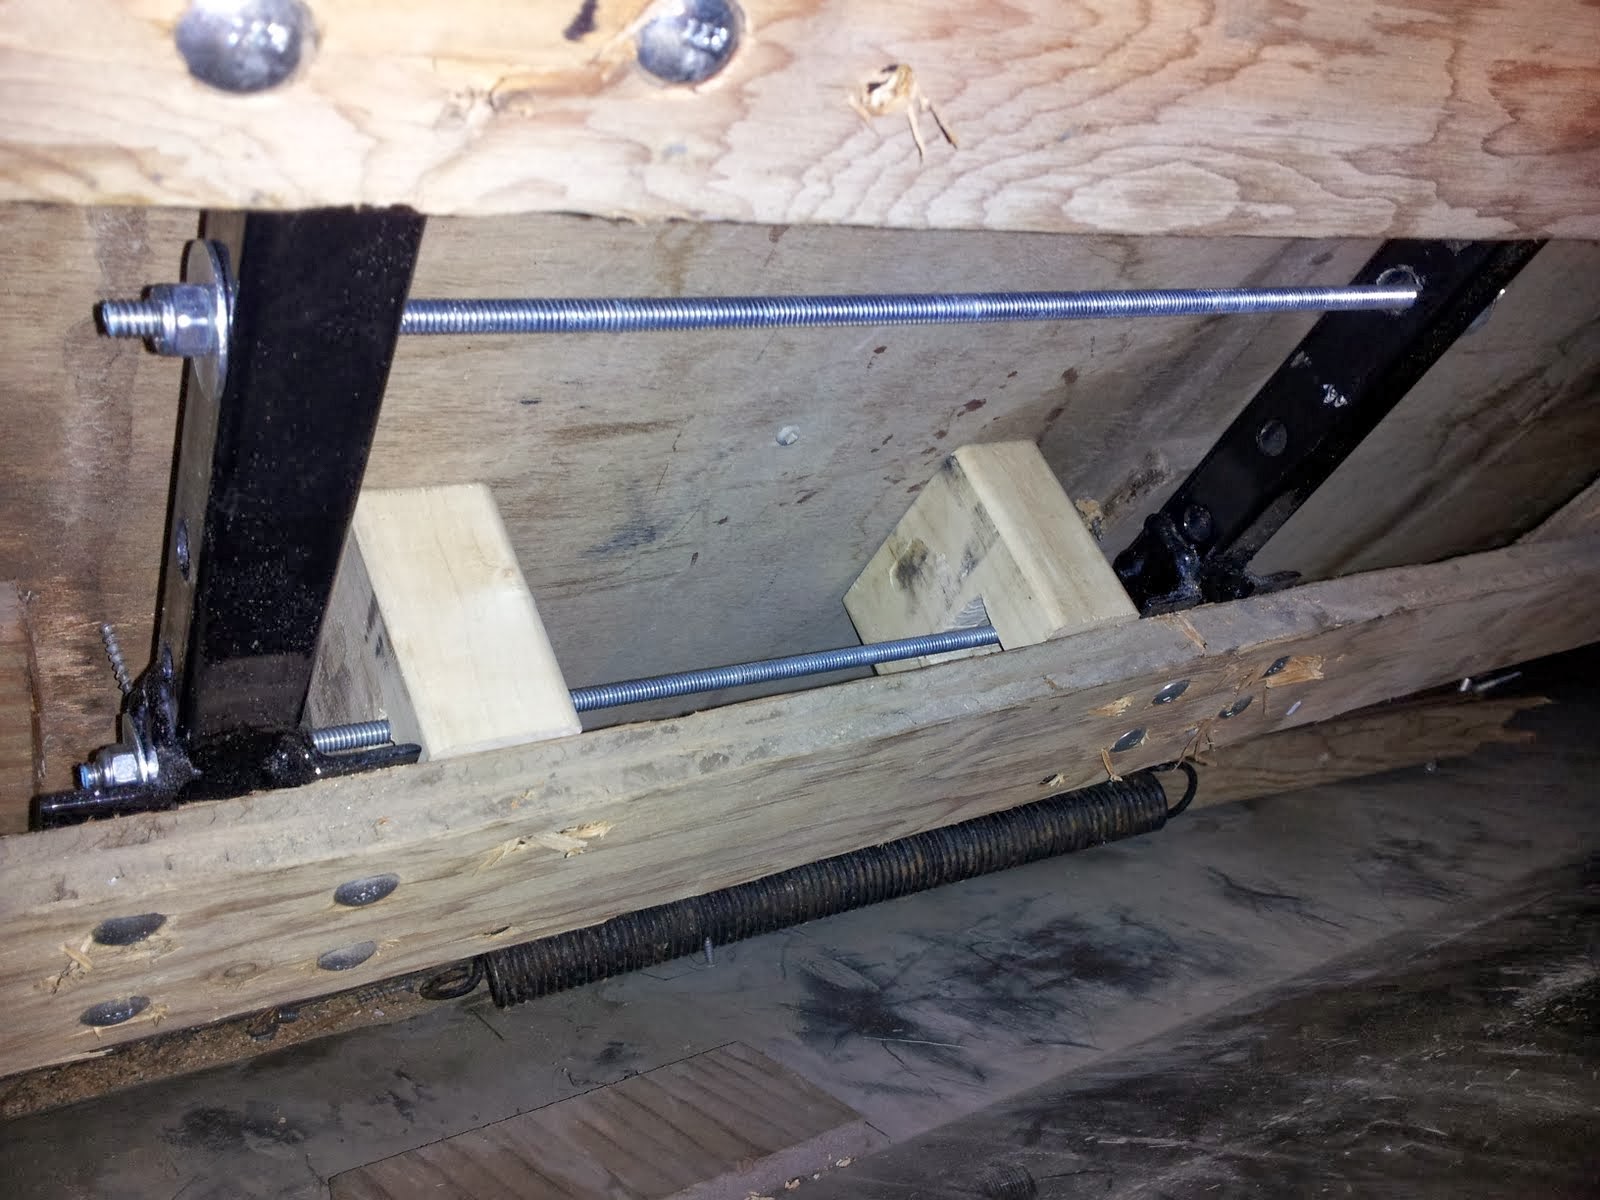
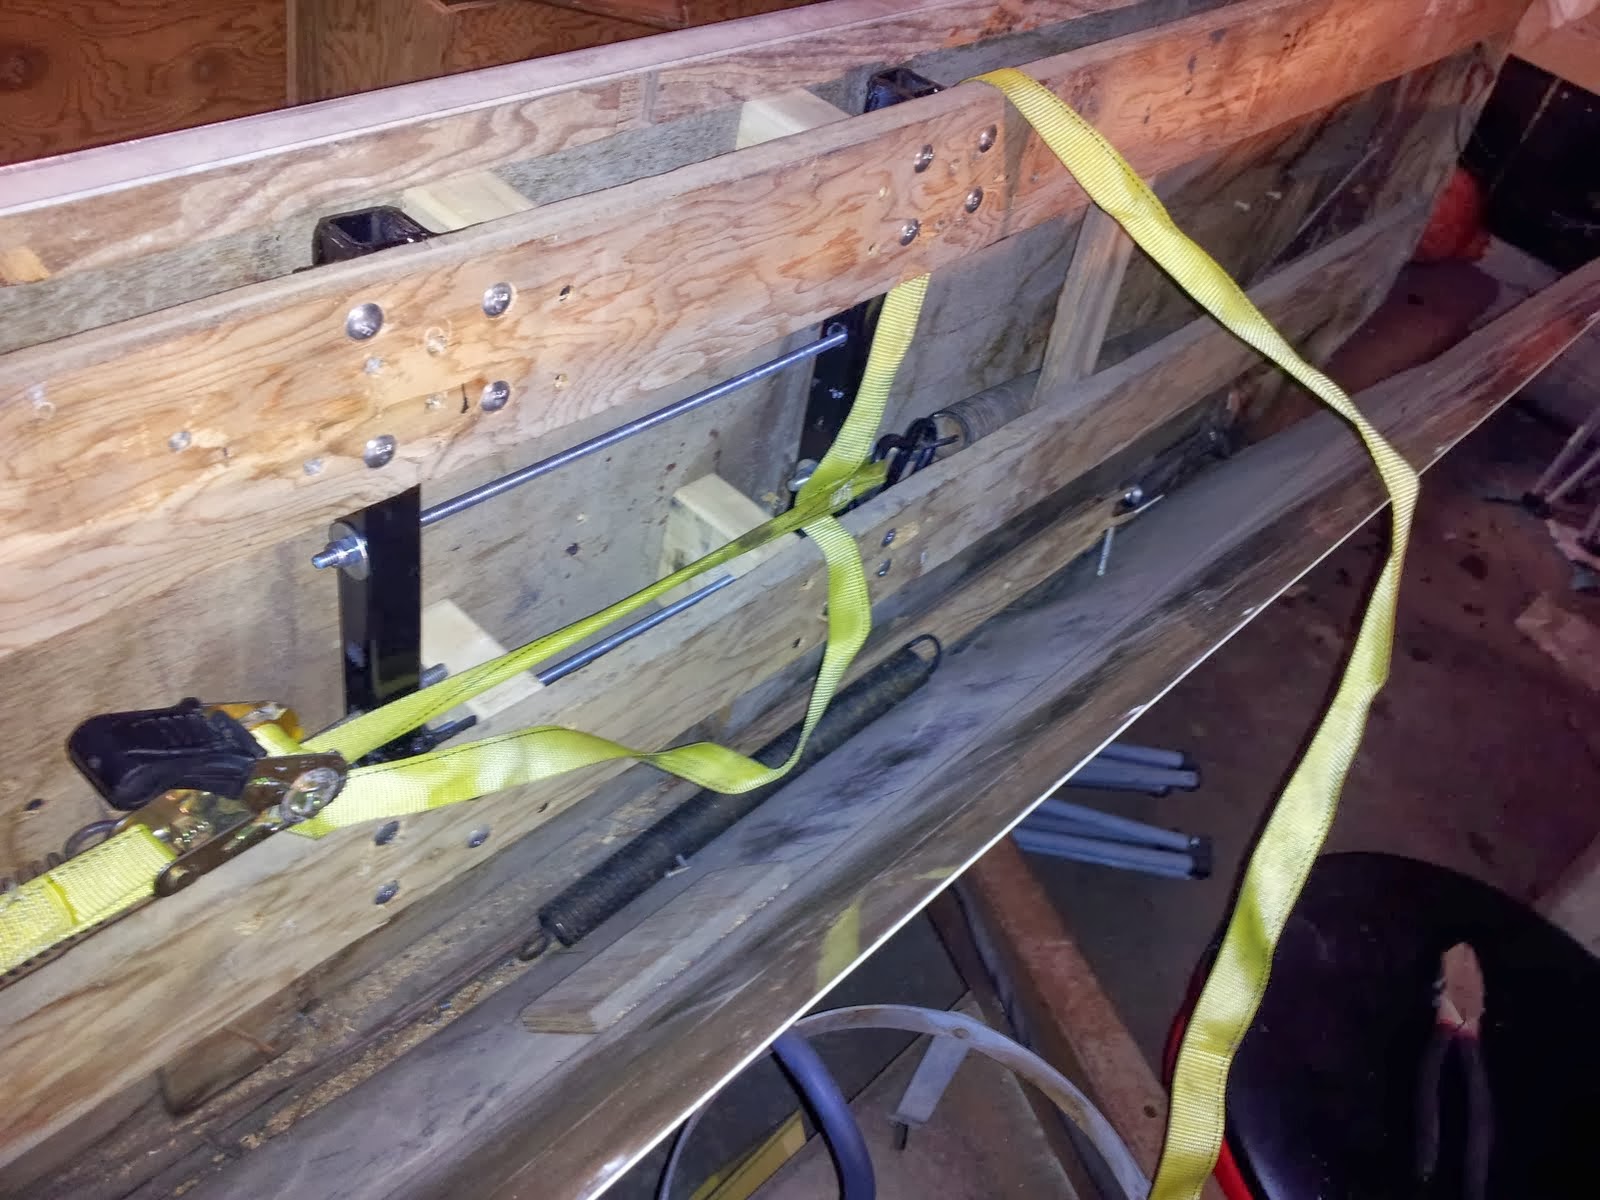
Something I was semi-aware of when building this roof was weight.  I needed to keep it down in order to avoid overwhelming the lift system.  I kept weight in mind when choosing materials, but with the 26 ga. roof panels it became a bit too much.  It is not impossible to raise the roof up, but it isn't the one finger lift Bethany had in mind when they designed this.  I went through and tightened up all the springs on the lift system, which did help, but it still requires a fair bit of strength to get the roof up.  This isn't something I would want my grandparents doing.  So if anybody else is doing this, it may be worth trying to do a better job of weight control than I did.


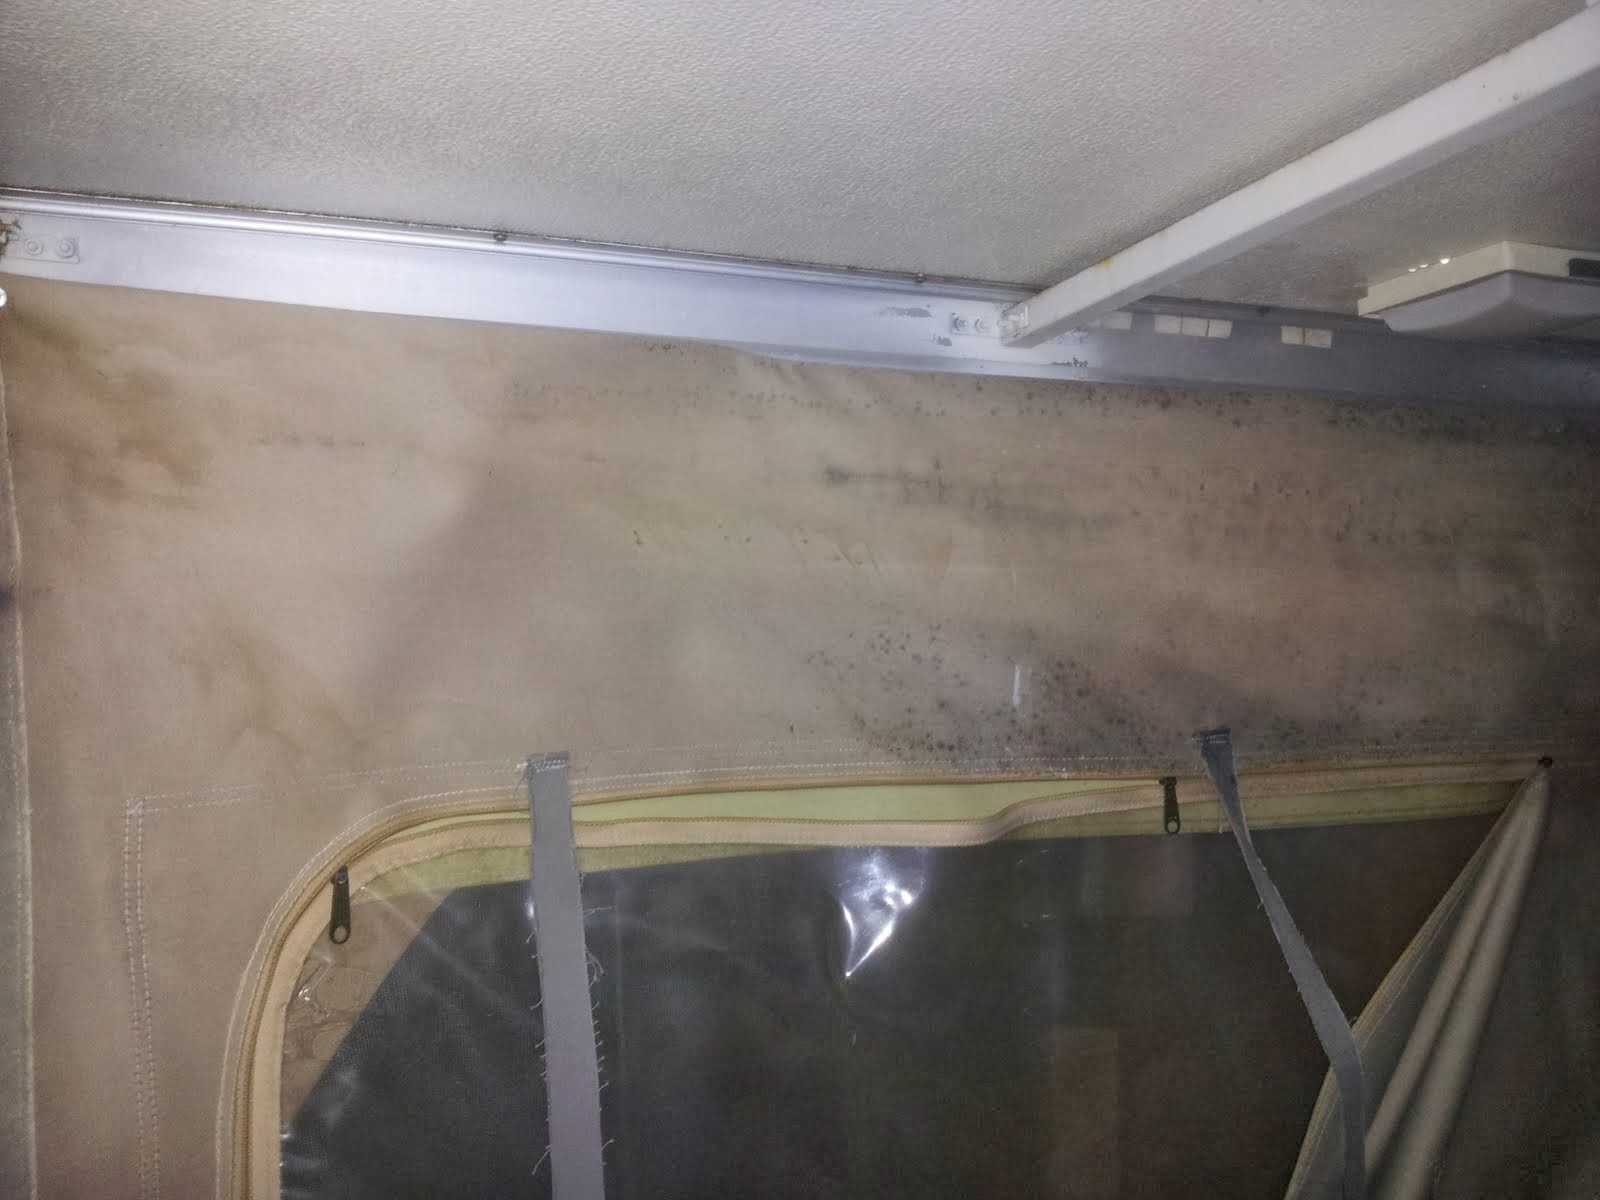
Just when I thought the roof/ceiling was all finished I found another issue.  I had left the camper set up in my driveway and upon returning home from work found that the plastic panels that made up the ceiling had come unglued and were drooping down, along with the wiring raceway attached to it.  For anyone else attempting this, DO NOT USE THERMOPLASTIC WALL PANELS for anything.  Temperature has a huge effect on them.  Thermal growth is massive and glue just doesn't stick to them well at all.  I should have known right away but the wild temperature swings in an RV just aren't a good environment for these  Anyway I ripped them all out and installed plywood wall panels.  They are too thick to fit in the groove around the perimeter of the roof, so I had to screw them to the underside of the groove.  It doesn't look as nice as I wanted it to, but it's functional and not too bad.  Ideally I would have used steel or aluminum paneling as was done originally, but it was prohibitively expensive and hard to find.  The original panel was rusty and gross so re-using it wasn't an option either.  I now have a stable ceiling anyway so I'm happy. 

Monday, May 12, 2014

Interior Work

With the roof structure in place and the weather a little more mild, I started working on some of the interior stuff for the camper.  I decided from the beginning to use raceway for the wiring instead of trying to run it inside the roof.  This will make it easier to troubleshoot and/or add things later on if I want to.  I also decided to install LED lights due to low power draw.  The camper wasn't set up for a battery when I got it, but I would like to install one at some point so current draw is important to me.


Installing LED lights, raceway, and wires.


Let there be light!  I hooked them up to a Vexilar battery for testing.


I also decided to scrap the old roof vent and buy a new one.  I bought one of the vents with a fan in it.  It has 3 speeds and sounds like a small airplane at top speed.  It really moves air.  I think I'll be glad I bought this come summer.

The old power supply was rated for 4A.  All the LED lights together draw a little bit less than 1A, and the fan draws 3A at full speed.  This was a little too close to the limit of the power supply for me, and besides it is 30 years old and probably not all that efficient anyway.  I decided to bite the bullet and upgrade the power supply too.  I bought a WFCO 8712-P that is good for 12A of 12V and has two slots for 110V circuit breakers.  This should be plenty for me.  I also had a double 12V socket laying around so I decided to wire that in as well.  They may come in handy for charging phones/gps stuff/etc. when not hooked up to AC power.

Wiring up the new power supply.


New power supply installed, minus the cover.  I also put in a couple 12V plugs for phone chargers and stuff if needed.


After fastening down the countertops to the cabinets, my wife and I originally planned to paint the cabinets to hide the deteriorating contact paper.  I had concerns about the paint only being bonded to the contact paper, which was already failing, and peeling off.  We picked up some wall paneling from the hardware store and made new faces for the cabinets.  It is supposed to look like bamboo.    To make the skins, I just cut the paneling into strips and stapled them on.  This way, the grain runs vertical for the stiles and horizontal for the rails just like standard kitchen cabinets.  I'm pleased with the way they turned out.  I like the light color and I think it will work well with the darker floor (not yet installed) and countertops.  Later this summer, when I have access to a router & table, I'm going to make some new drawer fronts and doors.

Installing the new cabinet skins.


Fridge side cabinet


Stove side cabinet.

Things are really coming together.  It's looking less and less like a chopped up trailer and more like a camper.  I have ordered sheet metal panels for the roof from a local fabricator that should be done soon.  The floor and canvas still need to be installed, and I think I will skin all the fake wood 'walls' with something else, but I'm most excited at the prospect of being able to get this out of my garage and have room again!  Until next time, thanks for reading!


Tuesday, April 22, 2014

Major Milestone


I have hit a major milestone in my project.  I have finished the roof structure and put it back on the camper.  It's beginning to look like something now!  I have definitely learned a few things along the way, and hopefully this will help anyone else avoid the same mistakes.

The original roof had failed a long time ago.  It consisted of a sandwich of plywood, extruded polystyrene foam, and thin steel sheet for the ceiling.  This sandwich fit into slots in the aluminum side rails.  The actual roof covering was vinyl glued down to the plywood.  The plywood had delaminated due to being moist, and was so wet I could wring water out in some areas.  I found a thread a while back on popup portal detailing a roof rebuild on a Bethany of similar vintage.  I decided to model my rebuild after this one. I wanted to post a link but I couldn't find the thread again.

The previous owner used steel square tube to make rafters that prevented the roof from sagging down.  They are heavy and look bad, and I knew they had to go.  Since the only structural element in the original roof was the rigid foam, it would be very easy to damage the roof by setting something on it or something, and creating leaks that lead to further damage.  I purchased 5 pieces of 1"X2" Aluminum rectangular tubing that would be a part of the new roof 'sandwich'.  They are light, stiff, and strong, making them good for this application. Another thing I had to consider was wiring for the lights.  I decided to use raceway for the wiring, so if there are ever problems I can easily access the wires.  I also purchased a new roof vent with a fan in it to hopefully help keep the camper from becoming a sauna during the summer.

 Original roof sandwich demo.  You can see the water damage.  The glue in the plywood had disintegrated and the layers of veneer peeled off like paper.

Inside the camper as purchased.  You can see the steel 'rafter' and light gauge steel panel used for the ceiling.

Another problem I ran into was finding 1/8" plywood.  In order to fit the sandwich into the channel on the side rails, I was limited to a thickness of 1-3/16".  This meant I needed very thin material to make the inside ceiling, and 1/8" plywood for what would become the backer board on the roof.  I was able to find plastic wall paneling that I could use for the new ceiling, but just couldn't find 1/8" lauan plywood.  I was cleaning up a pile of material from the original roof that had become exposed after the snowmelt and found the answer.  The original material was that fake wood paneling stuff that was popular in the 70's.  A trip to the local Menards and I had all the material I needed for the roof, minus the waterproofing.


I finally had some decent weather, so I covered the camper trailer with a tarp and parked it outside so I could begin working on the roof.  I used a CAD program to lay out the different components and experiment with spacings of the aluminum pieces.  Once I had a design I liked,  I cut all the plywood and foam and dry fit everything.  I used some extra aluminum to reinforce the opening for the roof vent.
 Dry fitting the components of the roof sandwich together.  The aluminum rafters are light and strong, and will be hidden once the roof is completed.

Everything dry fit together correctly, so it was time to glue it together.  I decided to use gorilla glue, due to the good things I've heard about it.  It requires a bit more care than other glues, but it provides a strong, waterproof bond.  Something important to note is that the glue expands as it cures.  You need to clamp or weight down whatever you're gluing together.  I definitely wasn't prepared for that.  I had my family scrounging up anything heavy they could find.  We had all kinds of stuff from the garage, laundry soap, paint, anything to hold the foam down on the plywood.  It still raised up a little bit at the plywood seams but not enough to cause problems.  If I ever use this stuff again, I'll definitely be prepared with enough stuff to keep things flat.

Lots of junk to hold the foam down on the plywood while the glue cures.

After the glue was done curing I took the weight off and glued on the plastic panels that would be the ceiling inside the camper.  I used white wall panels I found at Menards that were thin enough.  I glued them down with FRP panel adhesive as recommended by the manufacturer of the panels.  I also left a gap between each panel.  I have concerns about how well the glue holds on to these panels, as well as thermal expansion.  When I ran my heater to warm up the garage to work the next day, the panels started to warp and bubble up.  For anyone else attempting this I would recommend finding a different material.  I'll have to find a way to deal with this later. 

 Plastic ceiling panels glued down.

I let the glue cure for the plastic panels overnight and put the rails on the next day.  It was difficult at first to get the slot on the rail lined up with the edge of the roof sandwich.  I ended up just starting at one end by shoving the rail on, and tapping it on the rest of the way with a mallet, being careful not to catch and kink the plastic panel or plywood.  All in all, fairly quick and easy.

The roof is put together and squared up.  It's kind of hard to see, but there is a spot on the lower part of the center panel that is warped from thermal expansion.
 
With the roof together and squared up, I was almost ready to install it on the trailer.  There were some design issues with the way the lifting system attached to the roof, so I had to take care of that first.  I'll get into that in the next post.  Thanks for reading!


Friday, April 4, 2014

Countertops

This has been a pretty brutal winter, not allowing much time for anything outside, so I haven't been working on the camper much.  I was able to build the new countertops in my basement. The original ones were bright orange and the finish was peeling off everywhere.  I also planned to get rid of the sink, so the old tops had to go.

The tops were glued down and difficult to remove.  I used an oscillating tool to plunge cut the glue joint out to help me pry the tops off. Trying to pry them off without cutting the glue resulted in wrecking the cabinets.  I still ended up destroying the face frame with the two drawers below the sink.

 Cutting the top up for removal.

Top is gone. 

Busted up face frame.


Once I had all the tops removed, I set to work making new ones.  I used 5/8" particle board to match what was there.  The original finish looked like some type of contact paper.  The new tops will be 1/16" thicker due to the laminate but I don't think it will be an issue.  I ended up needing to order a 4X8 sheet of laminate and using about 1/2 of it, as the tabletop was 42"X32" and the smaller sizes were only 30" wide.  I have some experience with laminate tops, so the process was pretty easy.  The toughest thing was keeping everything clean and working in cramped quarters.  I was able to borrow a trim router from a co-worker to trim the laminate flush with the edges.  The tops turned out very nice I think.


Cutting the table top.

Table top with laminate, trimmed and ready for edging.


Originally, I was going to finish all the ledges with laminate, but a co-worker had a genius idea to use T-molding.  I wanted a brown color, but couldn't find it for a reasonable price.  I ended up getting black trim with a leather texture imprinted in it.  I borrowed another router with a slot cutter to make the slot that holds the molding on.  I also thought I needed 5/8" trim because that was the thickness of the particle board.  I found a tip in an arcade game restoration forum that said to use 3/4" T-molding and trim it with a chisel.  You lay the flat side of the chisel against the laminate and push it along to trim off the excess.  It works beautifully, and you can't even notice where the laminate ends and the trim starts.  Perfectly flush.


T-Molding before trimming.


Trimmed Molding

Trimming process with chisel.
This is about the end of what I can do indoors, so now I'm waiting again for spring.  Once it gets warmer and dries out a bit I can get these installed, and then get started rebuilding the roof.


Monday, December 16, 2013

Broken Springs

I bought a jet heater so I would be able to work on the camper through the winter without looking like Randy from the Christmas Story.  I decided I could test it out while I worked on the front lift strut springs.  We were hit with a snowstorm right after thanksgiving and then it got extremely cold.  The heater worked fairly well and allowed me to work in a light jacket.
  The wood that holds the fixed ends of the springs had broken and needed to be repaired.


I believe the original design was kind of poor, so I decided to change it.  I built two new spring supports out of square tube and angle iron for the springs to attach to instead of wood.  The square tubing actually came from the 'rafters' a previous owner had put in to support the sagging ceiling.  You can see one of them in the pictures from the previous posts.
 New steel spring support


I used carriage bolts to attach these to the plywood cross members at the front of the trailer.  The plywood was in very good shape, so I saw no need to change it.
New spring supports installed on front of camper


 After the new metal supports were installed, I tied them together with two pieces of ready-rod.  This should counteract the force of the springs on the supports, reducing the amount of force the plywood cross members see.  The original wood spring supports tied the cross members to the interior paneling of the camper.  The steel ones were too short to attach the paneling to, so I had to come up with something else.  I cut some pieces of 2X4 to tie the plywood to the interior paneling.  It took a few tries to get the angles right but it worked well.  This stiffened the front up quite a bit.
 Ready-Rod installed on spring supports


To attach the springs, I used a ratchet strap to pull the springs out far enough that I could get a nut on the eye bolts.  It worked quite well.  
 Using ratchet strap to install springs and eye bolts


All done!  I believe this will stand up to the load from the springs better than the original design.  Time will tell.
 Finished front spring system


All in all, the work took two days, and most of the components were leftovers from other projects, so I didn't spend any money.  I ordered some butyl tape online so I can re-attach the sheet metal and seal it up.  I still need to get the roof started too.  I have a good idea of what I'm going to do for the guts, thanks to this thread, but still haven't figured out the outer layer.  Originally it was vinyl/canvas, but I'd like to use either rubber or metal panels as I think they would be more durable.  Oh well, I've got some time before I have to commit to that.  If anybody has any input on roof materials let me know!
Thanks for reading!

Bill

Saturday, December 14, 2013

Digging In

After I brought the camper home it sat in my driveway for about a month or so.  I was busy with hunting and work and never got a chance to start tearing into it.  After I got the garage cleaned out I brought it in and started working.  The following is from about the two weeks before Thanksgiving.  The first order of business was to remove the canvas.  I had to send it in to the outfit that was to build me a new canvas.  I used Canvas Replacements out of Wisconsin.  For anyone needing new canvas for their camper I would recommend them.  They were great to work with and happily answered all of my dumb questions.  The photo below shows some of the mildew and damage on the original canvas.

Taking the canvas out ended up being extremely easy.  There is a channel that the top of the canvas slides into from above and hangs.  To remove it, you just remove the three or four screws to make sure the canvas doesn't pop out and pull the canvas out.  I rolled up the canvas and boxed it up to be sent to Canvas Replacements.

Next step was the roof.  Originally I intended to just clean up the hack repair job the previous owners had done.  They told me the roof did not leak any more.  They lied.  I decided to go ahead and just rebuild the roof after coming across a few threads where people had done it before.  One was even a Bethany almost identical to the one I have. 

Getting the roof off proved to be a challenge.  It uses a bunch of springs to counteract the weight of the roof so you can lift it up easily with your hands.  The struts that link the roof/camper base/springs lock in place once the roof is all the way up so it doesn't fall down on you.  The struts are bolted to the corner brackets on the roof assembly, so there is no way to disassemble the roof without disconnecting these.  If the roof is lowered and the weight of the roof is removed from the struts, the force exerted by the helper springs on the struts makes them dangerous.  What I ended up doing was using a winch connected to the roof trusses of my garage to hold the roof up while I disconnected the struts. If you do this, don't do it like I did.  I disconnected the struts in the rear first and the roof slid rearward and into my head.  Thankfully no permanent damage to me or the roof, but it could have turned out bad.

Anyway, once I had the roof disconnected I used camlock straps to hold the struts down and out of the way while I worked.  You can see the straps in the picture below.


You can also see how hosed the roof was.  After removing the vinyl outer roof surface, I found water had completely delaminated the plywood underneath.  Each 'ply' just peeled off like a wet blanket.  It made for really easy disassembly.  At first I tried to salvage the steel sheet that was the inner 'ceiling' of the camper.  After looking at it the steel was corroded and in pretty rough shape so I'll have to get something else to make the ceiling when I rebuild the roof.

I also found the wooden boards the front springs attach to were broken  (see photo below). This is apparently a common problem with these.  The force of these springs is supported by a piece of 3/4" MDF and a strip of plywood, which broke in two.  With the amount of force exerted by the springs I'm surprised they have lasted this long.  I'll have to take care of this later as well.

At this point, I got pretty busy with Thanksgiving so I wasn't able to work on the camper for a while.  The last few weeks have been extremely cold, so I'm too much of a wuss to do much with the camper.  Once I have enough for another post, I'll update again.  Thank you for reading!

Bill

The New Camper

So, here it is.  Our new (to us) 1978 Bethany Citation 88 Pop-Up.  My wife has MS and a bad back, and I have a messed up disc as well, so camping on the ground has become tough.  We decided to get an RV.  We toyed with the idea of buying a new pop-up, but I didn't want to finance one.  Then we decided we wanted a hybrid, but they are much more expensive and I don't want to finance.  Eventually we decided to get an old camper that maybe needed some TLC.  This is the first time I've ever owned or been involved with RVs in any way, so I knew nothing about what I was getting into. A little internet research and some ad searching led us to the Bethany.


I stopped out to look at the camper and decided it would be best to talk to my wife before I committed to purchasing it.  Apparently they were using the camper, but the canvas was shot, as was the roof.  There was RTV gobbed on every seam on the roof.  Everything else was 70's ugly, but in good shape.  While talking with the wife I did some research on Bethany campers.  It turns out they have an interesting history.  They began in 1945, as a business venture to fund Bethany International, a Christian ministry.  Bethany continued to make campers until 1978 when they were sold to another company.  More can be found about Bethany's history here.  I also found out they were very well built and worth restoring.  Given my affinity for old and/or odd items, I knew I had to have it.  We bought it for what I believe was a fair price and I towed it home.

I decided to start this blog to mostly document for myself how the project goes, and also for others who may find it interesting.  I also hope it will help anyone else attempting a similar project.  I know the information I find in various forums and websites will be invaluable, so in return for all of that help I hope to add something of value for someone else in the future.